Tech Tip: Two Ways to Lay a Ripple Bead with the ORBiT™ Tip
There are two ways to lay a ripple bead with the ORBiT Tip. Option 1 can help you in hard to reach areas, while Option 2 may save you some time. No matter which option you use, always apply beads over primer and consult the Technical Data Sheet for full instructions.
OPTION 1: Making the Cosmetic Bead Remotely
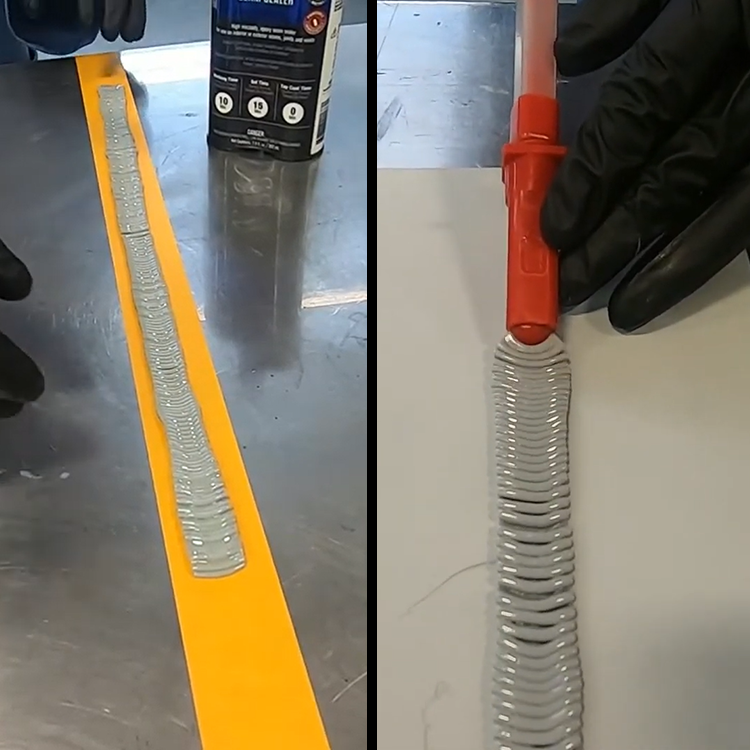
1) Make the bead off the vehicle, ideally on boxing or packing tape, and allow it to dry.
2) Remove the bead from the tape, and scuff the backside of the bead.
3) Lay a small bead of seam sealer on the vehicle seam and then place the ORBiT bead on top of the wet-bed to glue the cosmetic bead into place.
OPTION 2: Making the Cosmetic Bead on the Vehicle
1) Lay a small bead of seam sealer in the seam on the vehicle. Use a gloved finger, spreader, or acid brush to smooth out the bead and ensure the seam is functionally sealed.
2) Attach the ORBiT tip over the static mixer, and lay your ripple bead over the wet-bed of seam sealer.
ORBiT tips come packaged with SEM Dual-Mix™ Heavy Bodied Seam Sealers.
Recent Posts